Fall Cycling Lights: Lumens, Runtime and Being Seen at Dusk
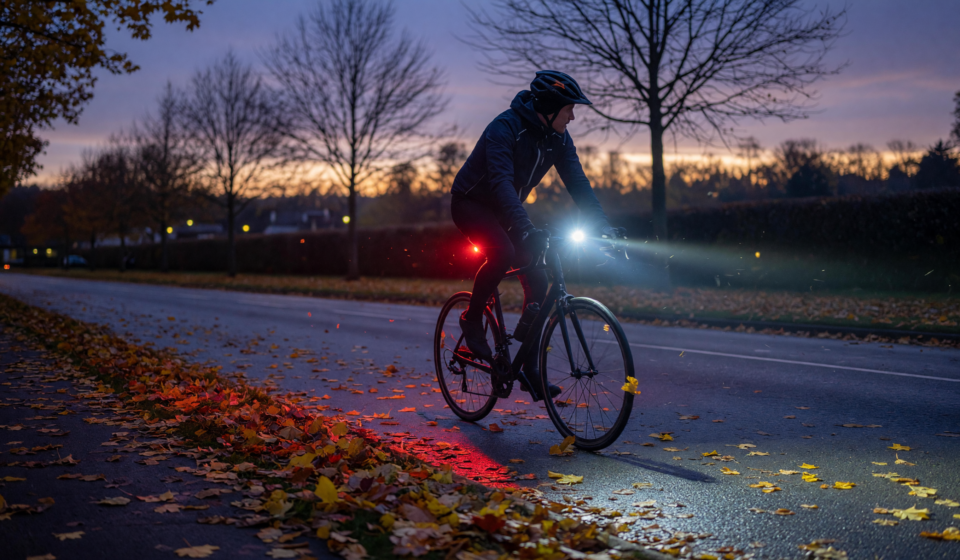
By the time September rolls around, the light changes fast. You leave the office at the same hour you did all summer, but now the sun is already sliding toward the horizon and the shadows are long across the bike lane. That in-between window, when the sky still looks bright to you but drivers can barely pick you out against the gray road, is exactly when things go wrong. Good cycling lights are not an accessory for that ride home, they are the difference between being a shape a driver notices half a block early and one they see far too late.
This guide walks through what actually matters when you shop for fall lighting: lumens (how bright a light is), runtime (how long it holds that brightness), and conspicuity (how easily others spot you). We will cover what US law does and does not require, why dusk is such a dangerous hour, how to read a spec sheet without getting fooled, and how to build a front-and-rear setup that carries you from a bright afternoon into full dark. The goal is simple: help you buy once, charge it, and ride knowing you are seen.
Why Dusk Is the Danger Zone
Twilight is deceptive. Your eyes adapt quickly, so the world still looks perfectly legible to you as you pedal. A driver’s eyes are adapting too, but they are scanning a much wider, faster scene through a windshield, often into a low sun or oncoming headlights. In that flat, contrast-poor light, a cyclist in dark clothing can blend into the pavement and hedges. This is why the transition periods around sunrise and sunset are consistently flagged as elevated-risk times for people on bikes.
Fall makes the problem worse in two ways. Daylight hours shrink week by week, so more of your regular commute lands in that low-light window. And the season brings wet roads, fallen leaves, and glare off damp asphalt, all of which cut how far ahead a driver can resolve a moving object. The fix is not to ride scared, it is to ride lit, in a way that reads as unmistakably human and in motion.
What US Law Actually Requires
There are two layers here, and confusing them trips up a lot of riders. At the federal level, the Consumer Product Safety Commission regulates bicycles as products under 16 CFR Part 1512. That rule requires bikes to ship with reflectors, a colorless front reflector, a red rear reflector, pedal reflectors, and wheel side reflectors, but it does not require an active headlight or taillight to be sold with the bike. In other words, a legal-to-sell bike is not automatically a legal-to-ride-at-night bike.
Actual riding requirements come from state vehicle codes, and they are remarkably consistent. Most states require, for riding at night, a white front lamp visible from a distance (commonly stated as roughly 500 feet) plus a red rear reflector, with many states also requiring or recommending a red rear lamp. Because the exact wording, distances, and whether a blinking rear light satisfies the “reflector” rule vary from state to state, it is worth a two-minute check of your own state’s code.
- Federal (CPSC): mandates reflectors on new bikes, not active lights.
- State codes: govern how you ride, and typically require a front lamp after dark.
- Practical takeaway: reflectors are a legal minimum and a passive backup, not a substitute for lights.
Reflectors versus lights. A reflector only glows when a driver’s headlights hit it at the right angle, so it does nothing to warn a driver approaching from the side at an intersection, or one whose lights are aimed slightly off. An active light emits on its own, in every direction you point it. Treat reflectors as insurance, not as your primary system.
Lumens: How Bright Is Bright Enough
A lumen is a measure of total light output. More lumens means a brighter light, but brighter is not automatically better, because the right number depends entirely on what you need the light to do. There are two jobs: being seen by others, and seeing the road yourself. A “be seen” light on a streetlit bike lane can be modest, while a light that has to illuminate an unlit country road needs far more punch.
As a rough, widely cited framework for where to start:
- Lit urban streets (be seen): a front light in the low hundreds of lumens and a rear light of roughly 50 to 100 lumens is usually plenty.
- Unlit or rural roads (see the road): plan on several hundred lumens up front so you can actually read the pavement and spot potholes or leaf piles in time.
- Daytime running lights: counterintuitively, standing out against bright daylight takes more output, often a few hundred lumens, paired with a flash pattern.
- Trail and gravel after dark: the highest outputs live here, but that is a different job than a fall commute.
One caution: raw lumen numbers on a box are not standardized the way you might hope, and beam shape matters as much as brightness. A well-designed optic that spreads light evenly across the road, with a cutoff that keeps it out of oncoming eyes, will outperform a cheap light with a bigger number that throws a harsh, narrow hotspot. If you can, look for lights that publish beam distance or beam-pattern images, not just a lumen headline.
👉 Shop front bike headlight (be-seen and see-the-road models) on Amazon (Ad — as an Amazon Associate, we earn from qualifying purchases.)
Runtime: Reading the Fine Print
Runtime is where the spec sheet earns a second look. A light advertised at a big lumen figure almost never holds that output for its advertised battery life, those two numbers usually describe different modes. The headline brightness might last an hour or two, while the long runtime figure is measured in a dim, economy setting. What you want to know is how long the light runs in the mode you will actually use on your commute.
A few habits keep you from getting stranded in the dark with a dead light:
- Match runtime to your real ride: add up your round trip, then add a margin for the days you linger or detour.
- Look for a low-battery indicator: a light that warns you before it quits, and ideally drops to a reserve mode, is worth a lot.
- Cold cuts capacity: lithium-ion batteries lose runtime as temperatures fall, so a late-fall ride will not stretch as far as a summer one.
- Charge on a schedule: topping up at your desk or on a weekend beats guessing whether last week’s charge will hold.
If your commute is long or your mornings are cold, consider a light with a replaceable or high-capacity battery, or simply keep a small backup light in your bag. Redundancy is cheap compared to walking a bike home along an unlit shoulder.
Being Seen: Position, Flash, and Reflectivity
Brightness is only half the equation. Where a light sits, how it behaves, and what you pair it with all shape how quickly a driver registers you as a person on a bike rather than an ambiguous glow. Motion is one of your strongest allies: lights placed on moving parts, like your ankles or pedals, create a bobbing, biological rhythm that the human eye locks onto far better than a static point.
- Flash for daytime, steady for dark: a flashing or pulsing mode grabs attention in daylight, while a steady beam (or a steady-plus-pulse combo) helps drivers judge your distance and speed at night.
- Mount at useful angles: aim your headlight slightly down so it lights the road without blinding oncoming traffic, and keep your rear light unobstructed by a bag or fender.
- Add reflective material low and moving: reflective ankle bands, shoe accents, and wheel or tire sidewall reflectors catch headlights from the side, exactly where a lamp pointed forward or back cannot help you.
- Wear high-contrast layers: fluorescent colors help by day, retroreflective trim helps by night, and a plain black shell does neither.
Side visibility deserves special mention for fall commuters, because intersections are where a huge share of bike-car conflicts happen. A driver pulling out from a side street is looking across your path, not down your beam. Reflective sidewalls and moving reflectors on your legs give that driver a signal your front and rear lamps simply cannot send.
👉 Shop reflective ankle bands and high-visibility accessories on Amazon (Ad — as an Amazon Associate, we earn from qualifying purchases.)
Front and Rear: A Balanced Setup
Think of your lighting as a system rather than a single purchase. The front light does double duty, letting you see and letting oncoming traffic and cross traffic see you. The rear light has one job that it needs to do brilliantly: warn the driver approaching from behind, who is closing on you at speed and has the least time to react. Do not skimp on the taillight just because it is small.
- Front: pick output for your darkest regular stretch, not your best-lit one, and choose a beam with a clean, road-shaped pattern.
- Rear: prioritize a wide, bright red light with a mode that stays visible in daylight; many riders run a steady and a blinking unit together.
- Backups: a small secondary light front and rear covers you if a battery dies or a mount rattles loose.
- Mounts: secure, tool-free mounts make it easy to move lights between bikes and to bring them indoors so they are not stolen or frozen.
👉 Shop rear taillight and front-plus-rear light sets on Amazon (Ad — as an Amazon Associate, we earn from qualifying purchases.)
Habits That Make Lights Work
The best light is the one that is charged, aimed correctly, and actually on your bike when the sun drops. Fall is the season to build a routine, because the light will keep shrinking through the fall and into winter, and a system you can run on autopilot beats one you have to think about every evening.
- Turn lights on early: switch to daytime flash before you think you need it, well before dusk sets in.
- Check aim weekly: vibration walks mounts out of position, so glance at your beam and rear angle regularly.
- Keep lenses clean: road grime and fall spray dim your output more than you would guess.
- Store smart: bring lithium-ion lights indoors in cold weather to protect runtime and battery health.
The Bottom Line
Fall riding is some of the best of the year, cool air, quiet roads, and long golden light, but that same light turns treacherous fast once the sun dips. You do not need the brightest, most expensive setup on the shelf. You need enough lumens for your darkest regular stretch, honest runtime that outlasts your round trip with margin to spare, and a conspicuous mix of steady and flashing lights backed by reflective material where drivers look. Buy a solid front-and-rear pair, charge them on a schedule, aim them well, and switch them on before you think you need to. Reflectors keep you legal and give you a passive backstop, but active lights are what make you seen at the hour that matters most. Get that right, and the shrinking days become something to enjoy rather than something to fear.
Disclaimer: This article is provided for general educational purposes only and does not constitute legal, safety, or professional advice. Bicycle lighting and equipment laws vary by state and locality and change over time; always confirm the current requirements in your jurisdiction and follow the manufacturer’s instructions for any product you use.
Sources: U.S. Consumer Product Safety Commission (CPSC), Requirements for Bicycles, 16 CFR Part 1512 (reflector requirements); state vehicle codes governing bicycle lamps and reflectors for nighttime riding (e.g., California Vehicle Code 21201); National Highway Traffic Safety Administration (NHTSA) bicycle safety guidance; League of American Bicyclists; and published bicycle-lighting buyer’s guides for qualitative lumen and runtime ranges.