
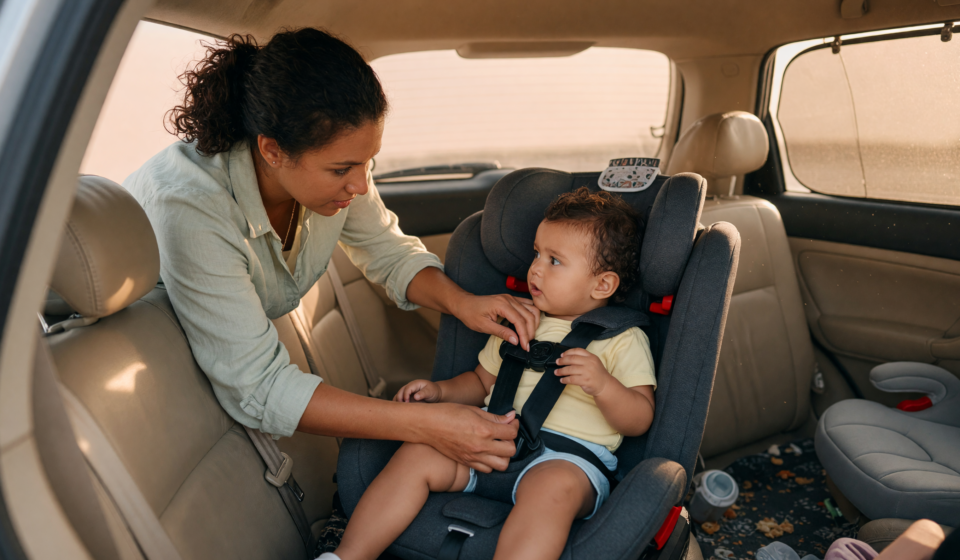
Child Car Seats in the US: Stages, LATCH and Common Mistakes
Few pieces of safety gear carry as much weight as a child’s car seat. It is the single most effective tool you have for protecting your kids on the road, yet study after study finds that a large share of seats are installed or used incorrectly. The good news is reassuring: getting child car seat safety right is not about being a mechanic or memorizing a rulebook. It is about understanding a handful of clear stages, learning to install the seat snugly, and avoiding a few predictable mistakes that even careful, loving parents make every day.
This guide walks you through the full journey, from the newborn coming home from the hospital to the tween who is finally ready for an adult seat belt. We will cover the four stages recommended by the National Highway Traffic Safety Administration (NHTSA), why staying rear-facing as long as possible matters so much, how the LATCH system works (including the weight limit that surprises most parents), the quick tests that tell you whether a seat is installed and buckled correctly, and the common errors worth double-checking tonight. Think of this as your calm, plain-English reference. Whenever your car seat manual disagrees with anything here, follow the manual.
Why Correct Car Seat Use Matters So Much
Car crashes remain one of the leading causes of death for children in the United States, and a properly used car seat dramatically reduces that risk. But “properly used” is the key phrase. Safety organizations have long observed that a striking number of car seats are installed too loosely, transitioned too early, or buckled in ways that would let a child move dangerously in a crash. A seat that is technically present in the vehicle but incorrectly used cannot deliver the protection it was engineered to provide.
Understanding child car seat safety is really about matching the right seat, in the right mode, to your child’s current size, and then securing both the seat and the child correctly. Kids grow in spurts, so the “right” answer changes over the years. The framework below makes those transitions predictable, so you are never guessing about what comes next.
The core principle. Keep your child in each stage until they reach the top height or weight limit of their seat, then move up. Every transition trades a small gain in convenience for a measurable step down in protection, so there is no prize for graduating early.
Stage 1: Rear-Facing Seats (Infants and Toddlers)
Every child begins life in a rear-facing seat, and this is the stage where the safety payoff is largest. In a frontal crash, a rear-facing seat cradles your child and moves with them, spreading the force across the entire back, neck, and head instead of concentrating it on a young, fragile spine. A baby’s head is proportionally large and their neck muscles are still developing, which is exactly why facing the rear is so protective.
There are two ways to ride rear-facing, and most families use both over time:
- Rear-facing infant seat: A smaller, carrier-style seat with a detachable base, ideal for newborns and easy to carry in and out of the car.
- Convertible seat used rear-facing: A larger seat with higher height and weight limits that lets children ride rear-facing well into the toddler years before it converts to forward-facing.
NHTSA advises keeping your child rear-facing as long as possible, until they reach the top height or weight limit allowed by the seat’s manufacturer. The American Academy of Pediatrics (AAP) echoes this, recommending that children remain rear-facing for as long as their seat permits rather than turning at a fixed birthday. Many convertible seats now accommodate rear-facing riders to 40 pounds or more, meaning plenty of two- and three-year-olds can and should still face the back. Their legs bending or crossing is normal and not a safety problem.
👉 Shop convertible car seat on Amazon (Ad — as an Amazon Associate, we earn from qualifying purchases.)
Stage 2: Forward-Facing Seats With a Harness
Once your child has genuinely outgrown the rear-facing limits of their convertible seat, they are ready to face forward in a seat with a five-point harness. This is still a substantial, harnessed seat, not a booster. The harness holds your child at five points, at both shoulders, both hips, and between the legs, so that crash forces are distributed across the strongest parts of a growing body.
NHTSA recommends keeping children in a forward-facing seat with a harness and top tether until they reach the manufacturer’s top height or weight limit, which for many seats now extends to 65 pounds or beyond. When you install a forward-facing seat, the top tether is not optional in spirit: it anchors the top of the seat to a dedicated point in your vehicle and significantly reduces how far your child’s head moves forward in a crash. We will return to the tether in the installation section, because it is one of the most frequently skipped steps.
As with every stage, resist the urge to move on early. A harness restrains a young child far more effectively than a seat belt and booster can, so the longer they stay harnessed within the seat’s limits, the better.
Stage 3: Belt-Positioning Booster Seats
A booster seat does one deceptively simple job: it raises and positions your child so the vehicle’s adult lap-and-shoulder belt crosses the strong points of their body, the hips and the center of the chest, rather than the soft abdomen and the neck. A child is ready for a booster only after they have truly outgrown the height or weight limits of their forward-facing harnessed seat, which for many kids lands somewhere in the early elementary years.
Boosters come in two forms, and both work by improving belt fit:
- High-back booster: Provides head and neck support and helps guide the shoulder belt; a good choice for vehicles with low seat backs or no head restraints.
- Backless booster: A lower-profile option for older, taller children who have outgrown a high-back booster but still need a lift for proper belt fit.
The critical rule with boosters is that they must always be used with a lap-and-shoulder belt, never a lap belt alone. The lap portion should sit low and snug across the upper thighs, and the shoulder belt should rest across the middle of the shoulder and chest, never sliding onto the neck or face. Kids stay in a booster until the adult seat belt fits them correctly on its own, which we test in the next stage.
👉 Shop booster seat on Amazon (Ad — as an Amazon Associate, we earn from qualifying purchases.)
Stage 4: The Seat Belt and the 5-Step Fit Test
Graduating from a booster to the vehicle’s seat belt alone is not about age; it is about fit. Most children need a booster until they are somewhere around 4 feet 9 inches tall, which typically happens between ages 8 and 12. The seat belt is designed for adult bodies, so the question is simply whether your child’s body has grown enough to make that belt fit the way it should.
Child passenger safety experts use a quick five-step fit test to decide. Your child is ready for the seat belt without a booster only when the answer to all five is yes:
- 1. Back against the seat: The child can sit all the way back against the vehicle seat.
- 2. Knees bend at the edge: Their knees bend comfortably over the front edge of the seat.
- 3. Lap belt low: The lap belt sits low and snug across the upper thighs, not the belly.
- 4. Shoulder belt centered: The shoulder belt crosses the middle of the shoulder and chest, not the neck.
- 5. Comfortable the whole ride: The child can stay seated this way for the entire trip, without slouching or tucking the belt behind them.
If any answer is no, your child still benefits from a booster. There is no downside to waiting; a belt that rides up onto the abdomen or across the neck can cause serious injury in a crash, which is the exact problem a booster is designed to solve.
How the LATCH System Works (and the 65-Pound Rule)
LATCH stands for Lower Anchors and Tethers for Children. It is a standardized system, required in most passenger vehicles and car seats made since 2002, designed to let you install a seat without threading the vehicle’s seat belt. It has two distinct parts:
- Lower anchors: Metal bars tucked into the crease where the vehicle’s seat cushion and seat back meet. Your car seat’s lower-anchor connectors clip onto these.
- Top tether: A strap at the top of a forward-facing seat that hooks to a dedicated anchor point, usually on the seat back, rear shelf, cargo floor, or ceiling, dramatically reducing forward head movement in a crash.
Here is the detail that surprises most parents: lower anchors have a weight limit. NHTSA and seat makers use a combined-weight rule, and a widely applied guideline is that once your child’s weight plus the seat’s weight reaches about 65 pounds, you should stop using the lower anchors and install the seat with the vehicle’s seat belt instead. Because the anchors themselves were engineered for lighter loads, a heavier child is actually more secure in a belt-installed seat. Your seat’s label and manual list the exact lower-anchor weight limit; do the simple math of child weight plus seat weight and switch to the seat belt once you cross it.
One rule that does not change: keep using the top tether on every forward-facing installation, whether you install with lower anchors or the seat belt. The tether is a separate safety component, and switching to belt installation never means abandoning it.
A final note on LATCH: unless your vehicle manual specifically approves it, do not borrow lower anchors from adjacent seating positions to install a seat in the center. When in doubt, a correct seat-belt installation is always a safe choice.
Installing Tightly: The Inch Test, the Pinch Test, and the Tether
A car seat is only as good as its installation, and two quick checks tell you almost everything. Whether you use LATCH or the seat belt, the goal is the same: a seat that does not budge and a harness that holds your child close.
- The inch test: Grab the seat at the belt path, where the belt or lower-anchor strap runs through it, and tug firmly front-to-back and side-to-side. A correctly installed seat should not move more than one inch in any direction.
- The pinch test: With your child buckled, try to pinch the harness webbing at the shoulder. If you can pinch a horizontal fold of slack, the harness is too loose; tighten until you cannot pinch any extra material.
Harness height matters too. For rear-facing seats, the harness straps should come from at or below your child’s shoulders. For forward-facing seats, they should come from at or above the shoulders. And the chest clip, the plastic buckle that connects the two shoulder straps, belongs at armpit level, not down on the belly or up near the throat.
For rear-facing seats, recline angle is its own safety detail: too upright and a newborn’s head can slump forward, compromising their airway. Most seats have a built-in angle indicator or adjuster to get this right. If achieving a snug install or the correct angle feels like a wrestling match, tools designed for the job, and a certified technician, can make the difference.
👉 Shop seat-belt/LATCH tightener or angle tools on Amazon (Ad — as an Amazon Associate, we earn from qualifying purchases.)
The Biggest Common Mistakes to Avoid
Most car seat errors are not dramatic; they are small, easy-to-miss habits. These are the ones safety technicians see most often, and each is quick to fix:
- A loose installation: The most common problem of all. If the seat moves more than an inch at the belt path, it needs to be tightened until it passes the inch test.
- Wrong harness height: Straps set above the shoulders for a rear-facing baby, or below the shoulders for a forward-facing child, reduce protection. Adjust as your child grows.
- Chest clip out of position: A clip resting on the belly instead of at armpit level can let a child be ejected from the harness. Slide it up to the armpits every time.
- Bulky coats and snowsuits: Thick winter clothing compresses in a crash, leaving the harness dangerously loose. Buckle your child first, then lay a coat or blanket over the harness for warmth.
- Turning forward too soon: Moving to the next stage before your child has outgrown the current one trades away meaningful protection.
- Expired or second-hand seats: A hidden but serious risk, covered in the next section.
None of these require special skills to correct. A two-minute check before your next drive, tug the seat, pinch the harness, slide the clip to the armpits, will catch the majority of them.
Registration, Expiration, and Used Seats
Three behind-the-scenes issues deserve as much attention as installation, because they determine whether your seat is trustworthy in the first place.
Register your seat. Fill out the registration card that comes with a new car seat, or register online with the manufacturer. This is the only reliable way to be notified directly if your specific seat is recalled. NHTSA also maintains recall information if you cannot locate your manufacturer. Registration takes two minutes and costs nothing.
Respect the expiration date. Car seats expire, typically six to ten years after manufacture depending on the model. Plastics degrade over years of temperature swings, standards evolve, and replacement parts stop being made. Check the label or the manual for the manufacture and expiration dates, and retire a seat that has passed them.
Be cautious with second-hand seats. A used seat can be a hidden gamble. Only consider one if you know its full history: it has never been in a crash, it is not expired, it has no recalls, it retains all its parts and its original label, and it has clear instructions. If you cannot verify every one of those, it is safer to buy new. A hand-me-down seat with an unknown past is not worth the risk to your child.
Back Seat Until 13 and Special Situations
Even after your child has graduated to the adult seat belt, one rule holds firm: keep them in the back seat through at least age 12, and ideally 13. The back seat is simply the safest place for a child to ride. Front passenger airbags deploy with tremendous force designed for adult bodies, and that force can seriously injure a smaller child sitting too close.
A few special situations are worth planning for in advance:
- Premature or small infants: Ask your hospital about a car seat fit check before discharge; some babies need extra positioning support.
- Three-across in one row: If you are fitting multiple seats side by side, narrower seats and careful belt-versus-LATCH planning can make a tight row work.
- Rideshares, taxis, and travel: Bring your own seat or a travel-friendly option when you can; the safest ride is still a properly restrained one.
- Children with medical needs: Some kids require specialized restraints; your pediatrician or a special-needs CPST can help you choose.
Whenever a situation feels uncertain, a Child Passenger Safety Technician can inspect your setup in person, often for free. Organizations like Safe Kids Worldwide host inspection events and can help you find a certified technician near you.
The Bottom Line
Car seats can feel intimidating, but the underlying logic is calm and consistent. Match the seat to your child’s size, keep them in each stage until they truly outgrow it, install snugly enough to pass the inch test, buckle tightly enough to pass the pinch test, and keep the chest clip at the armpits. Stay rear-facing as long as the seat allows, always use the top tether when facing forward, and remember the 65-pound combined-weight guideline for lower anchors. Keep your child in the back seat through the tween years, and retire seats that are expired or of unknown origin.
Do those things, and you have covered the essentials that protect your child every single mile. When you have a question the label cannot answer, a certified technician is your best friend, and the two minutes it takes to double-check a seat is time exceptionally well spent.
Disclaimer: This article is for general educational purposes only and does not replace the specific instructions that come with your equipment. Car seat models, weight limits, and vehicle requirements vary widely. Always follow your car seat and vehicle owner’s manuals, and consult a certified Child Passenger Safety Technician (CPST) for hands-on help with installation or any situation unique to your family.
Sources: NHTSA car seat guidance (Car Seats and Booster Seats; Car Seat Recommendations for Children by Age and Size); American Academy of Pediatrics (AAP) car seat recommendations; Safe Kids Worldwide child passenger safety resources; manufacturer LATCH and lower-anchor weight-limit guidance.