Kiteboarding Safety: Quick-Release Systems, Impact Vests and Wind Windows
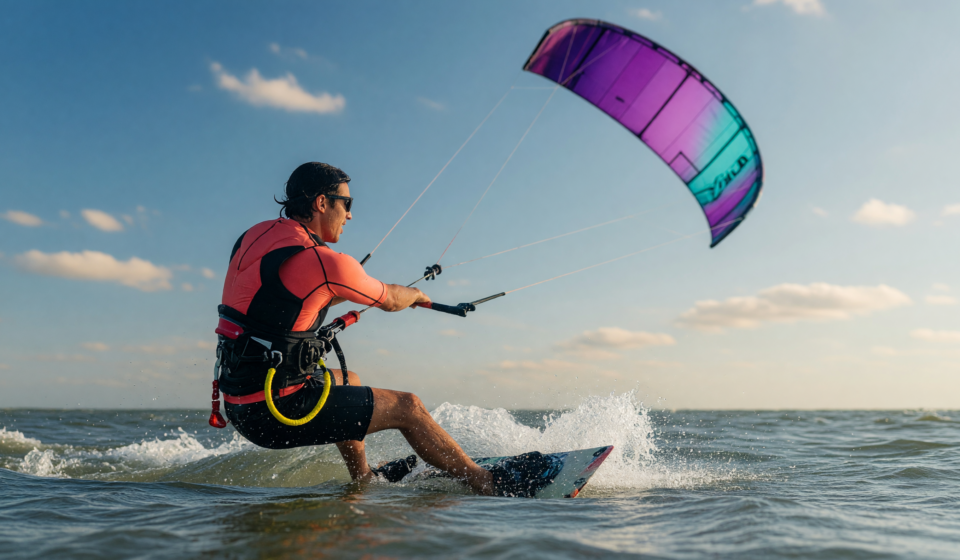
The moment a gust overpowers a rider, everything comes down to one thing: how fast the kite can be depowered and set free. A modern kite can generate enough pull to drag an adult across a beach, launch them into an obstacle, or hold them underwater, and that raw force is exactly why kiteboarding safety is built around a single reflex, hitting the release. Understanding the hardware that makes that release possible, and the invisible field of wind that governs how much power the kite is holding, is the difference between a scary story and a serious injury.
This guide breaks down the three pillars every rider should understand before hitting the water: the quick-release system that lets you dump the kite’s power in a heartbeat, the impact vest (and how it differs from a true flotation device), and the wind window, the three-dimensional zone of air where all of the kite’s power lives. We will keep it plain-English, point to the U.S. standards and agencies that actually apply, and explain the why behind each piece of gear so the choices you make on the beach are informed ones.
The Quick-Release System: Your Most Important Piece of Hardware
Every kite is flown from a control bar connected to your harness by a chicken loop. Sitting at the front of that loop is the quick-release, a mechanism designed to disconnect you from the kite’s main power the instant you need it to. When you punch it, the kite depowers dramatically and flags out on a single line, killing most of its pull. It is the fire extinguisher of kiteboarding: you may go a hundred sessions without touching it, but the one time you need it, nothing else matters.
Because it is so critical, the release has to work under the worst conditions imaginable, not on a clean workbench. Here is what separates a trustworthy system from a liability:
- Low activation force: You must be able to trigger it one-handed, under load, while being dragged. A release that needs two hands and a calm moment is not a safety device.
- Function when fouled: Sand, saltwater, cold, and grit are the reality of the sport. A quality release still fires when it is wet, dirty, and half-frozen.
- Reload under tension: Better systems let you reconnect on the water without fully returning to the beach, which reduces the temptation to skip the release entirely.
- Muscle memory: The hardware is only half the equation. You have to be able to find and fire the release without looking, every single time.
👉 Shop kiteboarding control bar with certified quick-release on Amazon (Ad — as an Amazon Associate, we earn from qualifying purchases.)
ISO 21853 and What “Certified” Actually Means
For years, quick-release designs varied wildly between brands, and there was no common yardstick for how hard a release should be to trigger or how fast it should let go. That changed with ISO 21853, an international safety standard for kite control bar quick-release systems that came into force in early 2020, developed alongside the Global Kitesports Association (GKA). It gave the industry, for the first time, an objective definition of a release that works.
The standard sets measurable targets rather than marketing claims. In broad strokes, it caps how much force a rider should need to activate the release, defines how quickly the system must open, and requires that it perform across dry, wet, sandy, and cold conditions, the messy real world rather than a lab bench. It also addresses signal-color visibility so the release handle is easy to find in a panic. Conformity testing is handled by a small number of independent facilities, historically the Fraunhofer Society in Germany and Camosun College in Canada, so a certification mark reflects genuine third-party testing rather than a self-declared spec.
Why it matters. A quick-release meeting ISO 21853 is engineered to open with limited force and within a defined time even when wet, sandy, or cold, exactly the moment you are least able to fight a stiff, gummed-up mechanism. Buying to the standard removes guesswork from the one component you cannot afford to have fail.
Reading the Wind Window: Where All the Power Lives
You cannot manage the kite’s power if you cannot picture where it comes from. The wind window is the three-dimensional slice of sky, roughly a quarter-sphere, that sits downwind of you and is bounded by the length of your lines. Wherever the kite flies inside that window determines how much pull it generates, and learning to read it is a core part of kiteboarding safety that no amount of gear can replace.
Riders use a clock face to describe it, with the kite directly overhead at 12 o’clock and the edges out near the horizon:
- The power zone: The center of the window, low and directly downwind, is where the kite shows the wind its full surface and generates maximum pull. This is where accidental power builds fastest.
- The edge (neutral zone): Out at the sides of the window and directly overhead, the kite produces mostly lift and very little forward pull. This is the calm, controllable region.
- Launch and land at the edge: Because kites are far more powerful than toy kites, you always launch and land at the neutral edge, never from the high-power center.
- Steering equals power: Diving the kite through the power zone is how riders generate drive, and it is also how beginners get yanked off their feet.
The practical takeaway: keep the kite parked near the edge when you are setting up, launching, landing, or dealing with a problem, and treat the power zone with respect. Most beginner incidents trace back to the kite sliding into the power zone at the wrong moment.
Impact Vests vs. Life Jackets: Know the Difference
This is the distinction that trips up the most riders, and it is a genuinely important safety point. An impact vest is a snug neoprene shell packed with closed-cell foam. Its job is to protect your torso and ribs from hard water landings and board strikes, and to add a modest amount of buoyancy so you sit a little higher while you sort out a tangle. What it is not is a certified life jacket. Most impact vests are not U.S. Coast Guard approved and will not reliably keep an unconscious rider face-up.
Choosing between an impact vest and true flotation comes down to honest self-assessment:
- Impact vest: Favored by riders who are confident swimmers in familiar conditions and want mobility, rib protection, and a little lift without bulk.
- Coast Guard-approved flotation: The right call for weaker swimmers, cold water, offshore or gusty spots, and anyone learning. Real buoyancy buys time when you are tired and tangled.
- Fit is everything: A vest that rides up over your face in the water is useless. It should be snug enough to stay put when the kite pulls you.
- Cold water changes the math: In cold conditions, exhaustion and cold-shock come fast, and genuine flotation becomes far more valuable than a few pounds of foam.
👉 Shop kiteboarding impact vest on Amazon (Ad — as an Amazon Associate, we earn from qualifying purchases.)
USCG Performance Levels and What They Mean for You
If you decide you want genuine flotation, it helps to understand how the U.S. Coast Guard labels personal flotation devices (PFDs). The old familiar Type I through Type V system has been phased out in favor of performance-based labeling that harmonizes U.S. rules with Canada and international standards. Instead of a Roman numeral, newer devices carry a performance level and a list of activities they are not approved for.
- Level 70: The most common recreational PFD, roughly equivalent to the old Type III. Good freedom of movement, but no guaranteed self-righting.
- Level 50: A buoyancy aid with no self-turning ability, intended for confident swimmers close to shore or rescue.
- Level 100 and 150: Higher-flotation devices, with the 150 aimed at offshore use and some self-righting capability.
- Read the “not approved for” line: The new labels tell you plainly where a device should not be relied upon, which is exactly the information a kiteboarder needs.
The key point for our sport: most dedicated kiteboarding impact vests are not Coast Guard approved at all. If you specifically need certified buoyancy, look for the level rating and approval statement on the label rather than assuming a neoprene vest qualifies.
The Safety Leash, Helmet, and Second Lines of Defense
The quick-release is your primary escape, but it does not work alone. After you fire the chicken-loop release, a safety leash keeps you tethered to the kite by a single front line so the depowered kite does not blow away without you, and most leashes carry their own secondary release for the rare case where you need to abandon the kite entirely. ISO 21853 accounts for the leash release as part of the overall system, which is why matching components from a coherent setup matters more than mixing and matching parts.
Rounding out the kit, a few more items earn their place in most riders’ bags:
- Helmet: Water at speed is unforgiving, and board or bar strikes to the head are a real hazard. A watersports-specific helmet is cheap insurance.
- Harness with a reliable spreader bar: The hook that holds your chicken loop must let the release do its job without snagging.
- Hook knife: A small blade tucked into the harness cuts a line you cannot otherwise clear, a last resort when everything else has fouled.
- Sun and abrasion protection: A rash guard or wetsuit prevents the small, energy-sapping injuries that compound a bad situation.
👉 Shop watersports helmet and kiteboarding harness on Amazon (Ad — as an Amazon Associate, we earn from qualifying purchases.)
Training and Certification: The Gear Behind the Gear
No release mechanism, vest, or helmet substitutes for knowing what you are doing. Kiteboarding is one of the few board sports where structured instruction genuinely reduces risk, because so much of the danger lives in judgment calls: reading the forecast, choosing a spot, sizing your kite, and self-rescuing when things go wrong. Organizations such as the International Kiteboarding Organization (IKO) publish rider standards and certify schools and instructors, giving beginners a recognized path from first launch to independent rider.
Beyond formal lessons, the habits that keep experienced riders safe are simple and repeatable: check your lines and release every session, never ride alone in questionable conditions, know your local hazards and right-of-way, and practice firing your release on the beach until it is pure reflex. Local knowledge, an offshore wind that looks inviting but pushes riders out to sea is a classic trap, is safety equipment you cannot buy.
The Bottom Line
Kiteboarding rewards riders who respect the physics and prepare for the worst moment, not the average one. Buy a quick-release built to the ISO 21853 standard and practice using it until it is instinct. Understand the difference between an impact vest and Coast Guard-approved flotation, and choose based on your swimming ability, the water temperature, and how far you ride from shore. Learn to read the wind window so you keep the kite’s power where you want it. Add a helmet, a leash, and a hook knife, then get proper instruction from a certified school. The gear buys you a second chance, but knowledge is what keeps you from needing one.
Disclaimer: This article is provided for general educational purposes only and does not constitute safety, medical, or professional certification advice. Standards, product specifications, and regulations change over time. Always follow the manufacturer’s instructions, seek qualified in-person instruction, verify current U.S. Coast Guard and standards requirements, and use your own judgment before kiteboarding.
Sources: International Organization for Standardization (ISO 21853, kite control bar quick-release systems); Global Kitesports Association (GKA); International Kiteboarding Organization (IKO) rider and school standards; U.S. Coast Guard, Office of Design and Engineering Standards (personal flotation device labeling and performance levels); manufacturer and instructional references on the kiteboarding wind window.